iMessage Spam Detection with CoreML
Background
A couple years ago, iMessage spam started becoming annoying enough to be reported on by a variety of major news sites. Apple responded to the situation by allowing users to report messages that didn’t come from their contacts for review and potential suspension of the sender’s account.
Detecting spam is an age-old problem that has somewhat recently been taken on with great success by machine learning. And running these models became magnitudes easier with the release of CoreML at WWDC this year. In this post, we develop a simple iMessage App to detect whether a message is spam or not.
About CoreML
Here’s a quick visual of the CoreML stack:
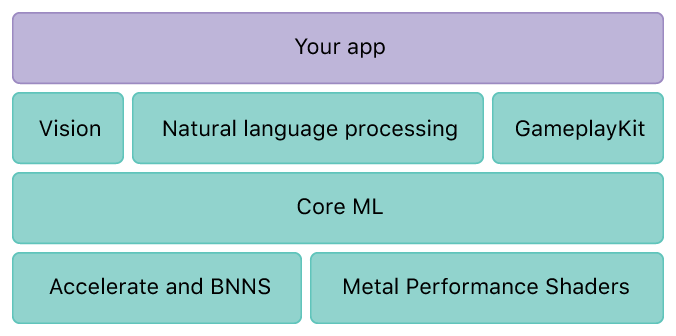
Python models are converted using the coremltools package (not pictured) into Apple’s new .mlmodel format which can then be used on iOS devices with all the GPU/CPU threading/compute enhancements provided by Accelerate (linear algebra library), BNNS (basic neural network subroutines), and MPS (GPU interface).
Let’s take a look at the data we’ll be using. Messages are binary classified as either “spam” or “ham” (everything else). As expected, the messages are short and use many non-standard words. We’ll need to use a model that can generalize easily. This dataset is also ham dominated - only around 13% of the data is spam. Our model needs to be able to respond well to unbalanced data. Now a multinomial naive Bayes classifier is the standard in spam detection but a survey of the literature indicates that SVM’s and random forests are picking up steam. We’re going to try all three of these approaches on top of both the bag-of-words and tf-idf vectorization procedures and choose the best of the 6 to include in our app.
To incorporate an ML model into an iOS app, one needs to:
- Train the model in one of the CoreML-supported python frameworks
- Convert it into a .mlmodel file through the coremltools python 2.7 package
- Drop the .mlmodel file into one’s app and use the provided methods to input data and generate predictions.
As an aside, it is currently not possible to perform additional training after an .mlmodel has been generated. However, it is possible to build a neural network using nothing other than coremltools - take a look at the neural network builder file under coremltools if curious.
Choosing a model
All code for this post is available from here.
raw_data = open('SMSSpamCollection.txt', 'r')
sms_data = []
for line in raw_data:
    split_line = line.split("\t")
    sms_data.append(split_line)
Then, divide it up into messages, labels, training, and test:
sms_data = np.array(sms_data)
X = sms_data[:, 1]
y = sms_data[:, 0]
X_train, X_test, y_train, y_test = train_test_split(X, y, test_size=0.15, random_state=22)
Build the 6 pipelines:
pipeline_1 = Pipeline([('vect', CountVectorizer()),('clf', MultinomialNB())])
pipeline_2 = Pipeline([('vect', CountVectorizer()),('tfidf', TfidfTransformer()),('clf', MultinomialNB())])
pipeline_3 = Pipeline([('vect', CountVectorizer()),('clf', SGDClassifier())])
pipeline_4 = Pipeline([('vect', CountVectorizer()),('tfidf', TfidfTransformer()),('clf', SGDClassifier())])
pipeline_5 = Pipeline([('vect', CountVectorizer()),('clf', RandomForestClassifier())])
pipeline_6 = Pipeline([('vect', CountVectorizer()),('tfidf', TfidfTransformer()),('clf', RandomForestClassifier())])
pipelines = [pipeline_1, pipeline_2, pipeline_3, pipeline_4, pipeline_5, pipeline_6]
Now the fun part - perform the classification and check precision/recall (we only have 2 classes and we want both a low false positive rate and a low false negative rate):
for pipeline in pipelines:
    pipeline.fit(X_train, y_train)
    y_pred = pipeline.predict(X_test)
    print(classification_report(y_test, y_pred, target_names=["ham", "spam"]))
In my testing, the SVM seems to perform the best with an average precision of 99%, a result that is supported by work in the field. Using tf-idf doesn’t seem to have a large influence on the classification result but as doing so is best practice we’re going to include it as a step in our pipeline.
Creating a model file
coremltools is a python 2.7 package so make sure to do the following step in the appropriate python version. To create a virtual environment to run 2 versions of python on a Mac, use the following commands:
brew install pyenv
pyenv install 2.7.12
pyenv global 2.7.12
pyenv rehash
And then run:
pip install scipy
pip install sklearn
pip install coremltools
To create the .mlmodel file, run the following lines. Note that as of the writing of this post, CoreML does not support tf-idf or count vectorizers so we’ll have to calculate the tf-idf representation in the app. For that, we need an ordered list of words that we also generate below.
vectorizer = TfidfVectorizer()
vectorized = vectorizer.fit_transform(X)
words = open('words_ordered.txt', 'w')
for feature in vectorizer.get_feature_names():
    words.write(feature.encode('utf-8') + '\n')
words.close()
model = LinearSVC()
model.fit(vectorized, y)
coreml_model = coremltools.converters.sklearn.convert(model, "message", 'label')
coreml_model.save('MessageClassifier.mlmodel')
You can download all of the above commands as one file from here and the generated model from here.
Creating the iMessage App
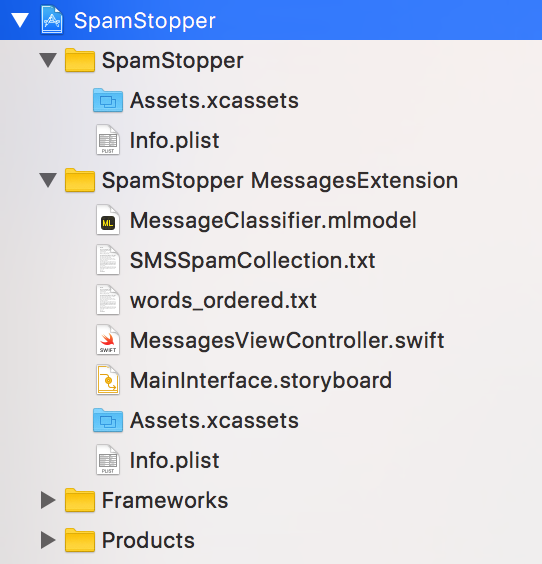
Create a new iMessage App project in Xcode 9 and drop in the original text file as well as the model and file we just generated. Your directory structure should look something like this:
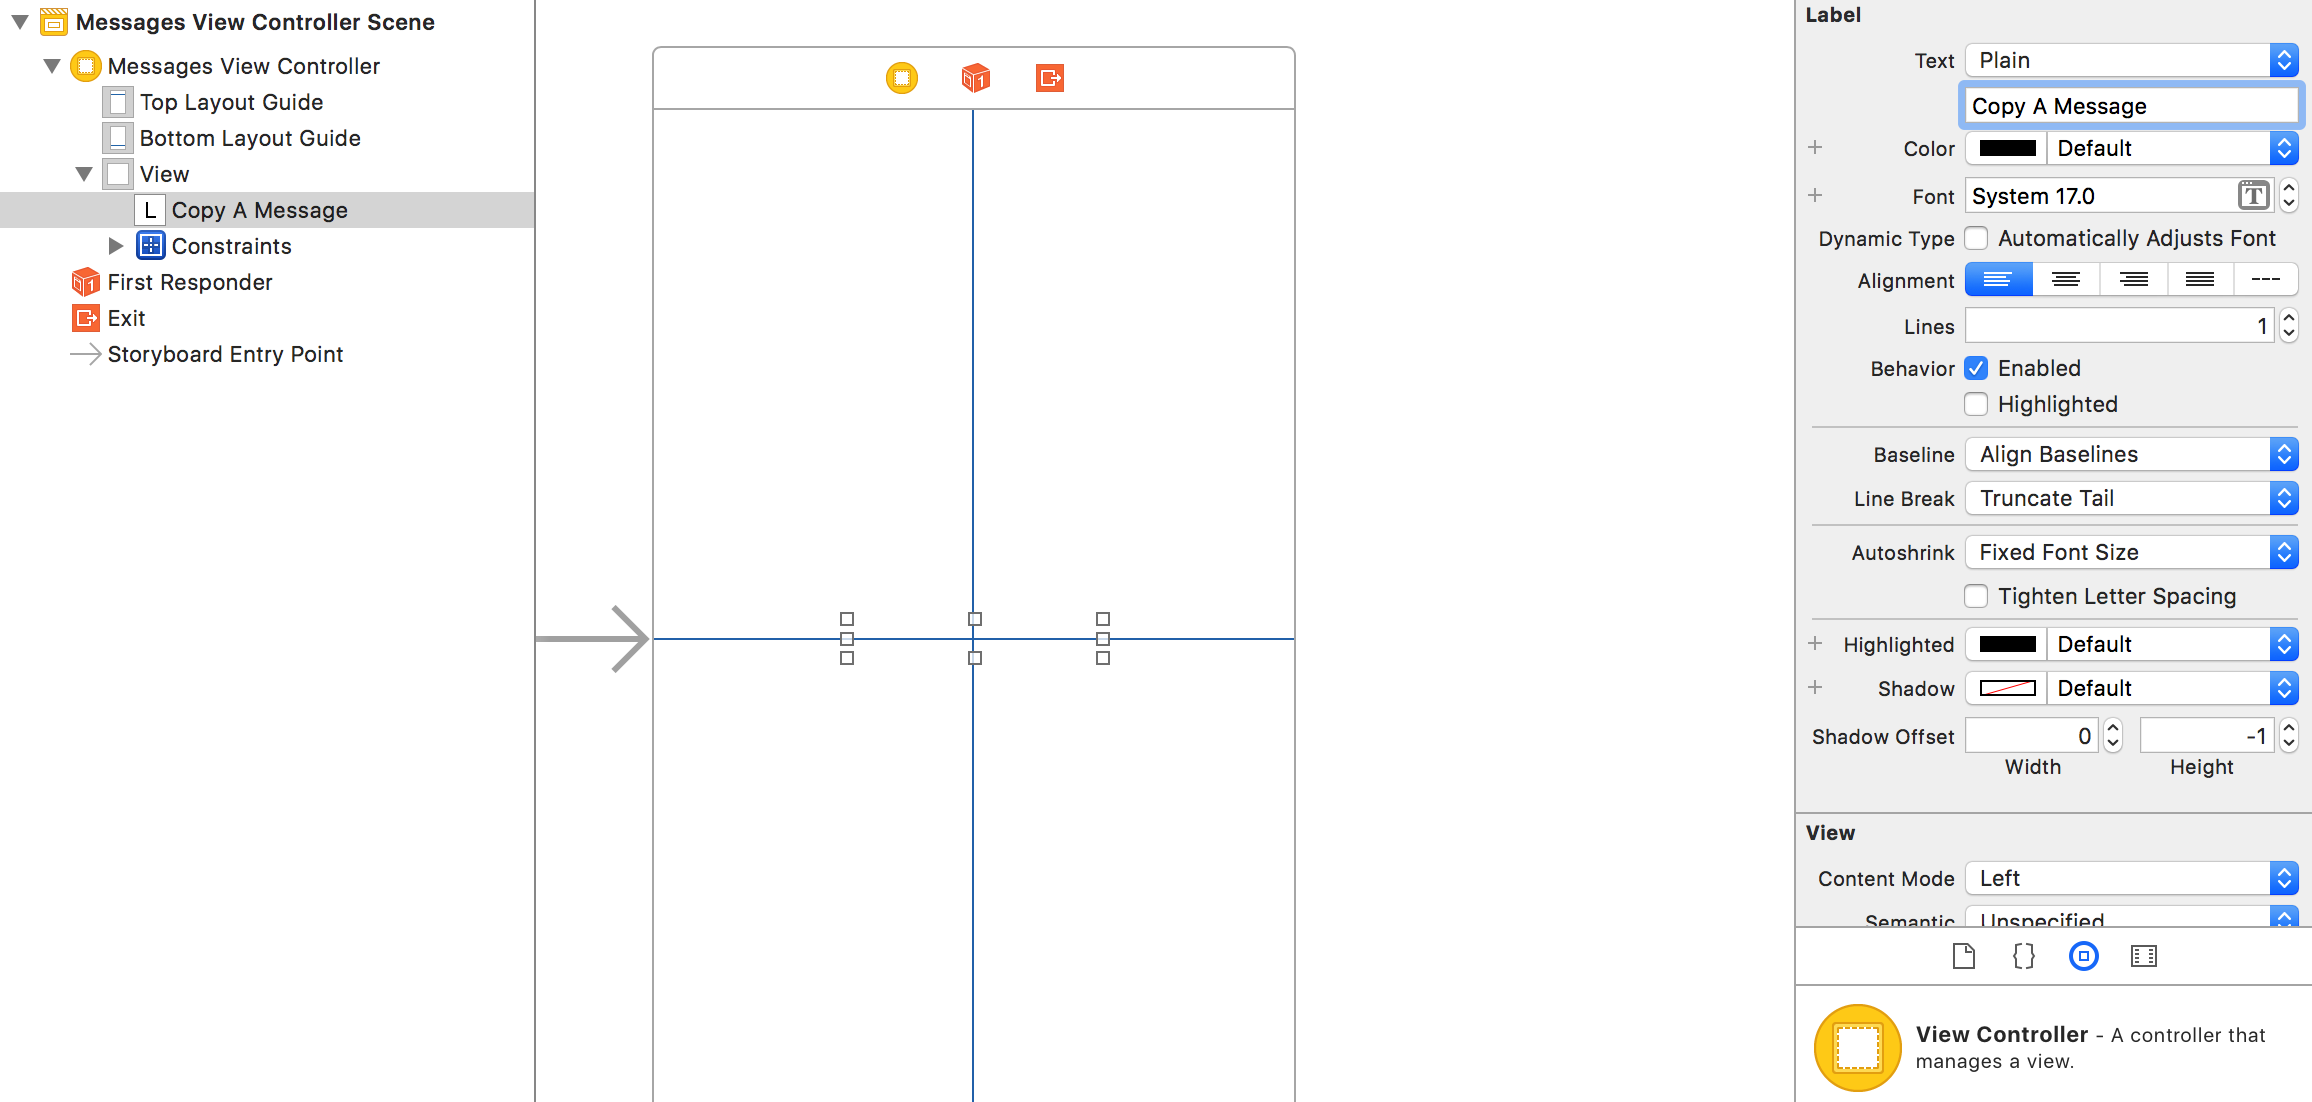
Open up the Main Storyboard and change the text of the label from “Hello World” to “Copy a Message”:
Next, open up the assistant editor and add an IBOutlet for the label by control-dragging to the file that opens up. Add a button and do the same but create an action instead.
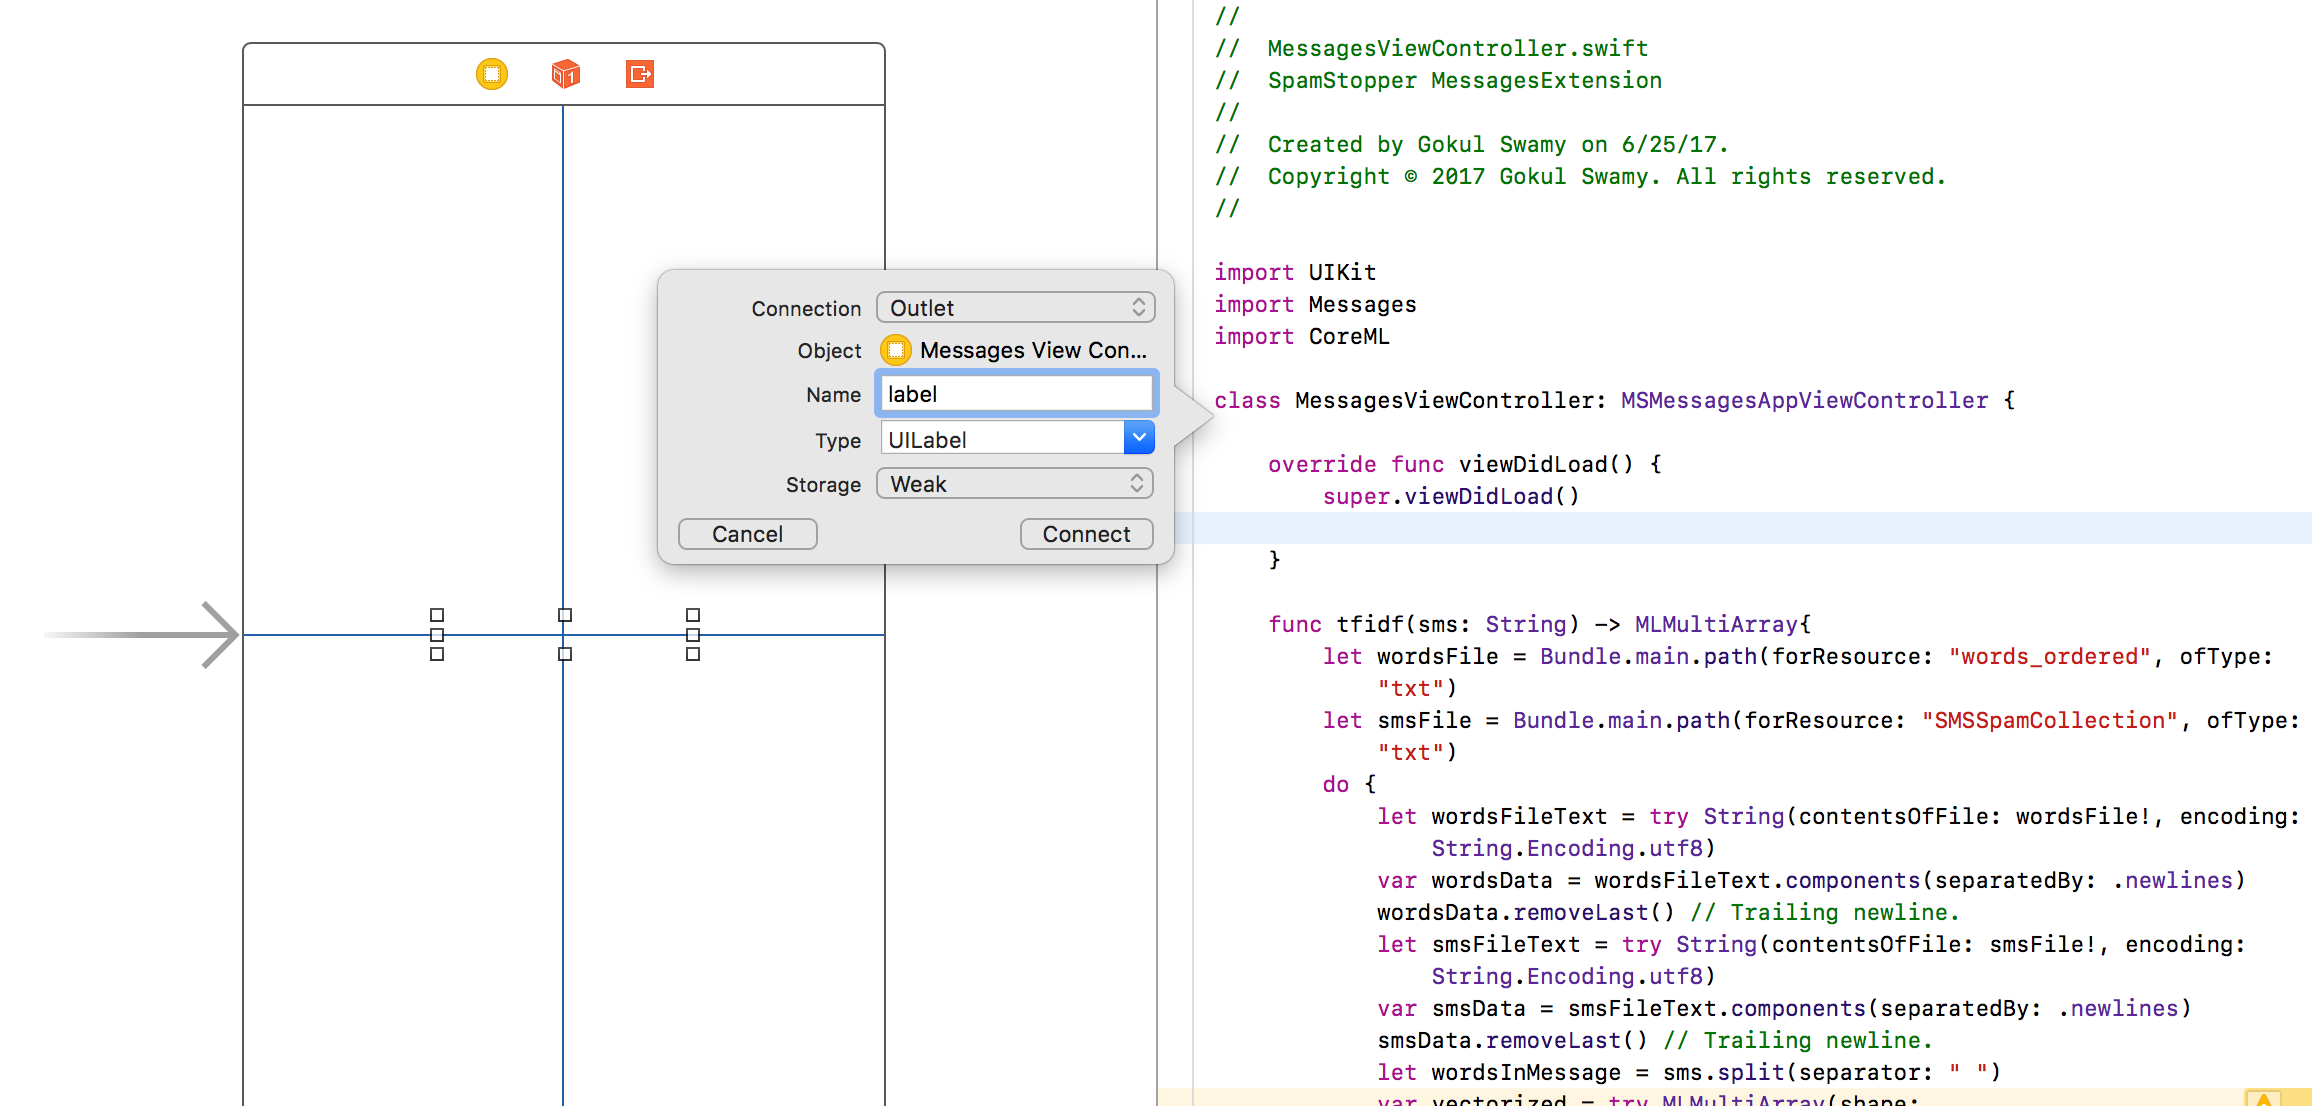
Open up MessagesViewController, import CoreML, and paste in the following helper method. It calculates the tf-idf representation of the user’s text using the SMS dataset.
func tfidf(sms: String) -> MLMultiArray{
        let wordsFile = Bundle.main.path(forResource: "words_ordered", ofType: "txt")
        let smsFile = Bundle.main.path(forResource: "SMSSpamCollection", ofType: "txt")
        do {
            let wordsFileText = try String(contentsOfFile: wordsFile!, encoding: String.Encoding.utf8)
            var wordsData = wordsFileText.components(separatedBy: .newlines)
            wordsData.removeLast() // Trailing newline.
            let smsFileText = try String(contentsOfFile: smsFile!, encoding: String.Encoding.utf8)
            var smsData = smsFileText.components(separatedBy: .newlines)
            smsData.removeLast() // Trailing newline.
            let wordsInMessage = sms.split(separator: " ")
            var vectorized = try MLMultiArray(shape: [NSNumber(integerLiteral: wordsData.count)],
                                              dataType: MLMultiArrayDataType.double)
            for i in 0..<wordsData.count{
                let word = wordsData[i]
                if sms.contains(word){
                    var wordCount = 0
                    for substr in wordsInMessage{
                        if substr.elementsEqual(word){
                            wordCount += 1
                        }
                    }
                    let tf = Double(wordCount) / Double(wordsInMessage.count)
                    var docCount = 0
                    for sms in smsData{
                        if sms.contains(word) {
                            docCount += 1
                        }
                    }
                    let idf = log(Double(smsData.count) / Double(docCount))
                    vectorized[i] = NSNumber(value: tf * idf)
                } else {
                    vectorized[i] = 0.0
                }
            }
            return vectorized
        } catch {
            return MLMultiArray()
        }
    }
Add the following lines to the button-bound function you created:
let copied = UIPasteboard.general.string
        if let text = copied {
            let vec = tfidf(sms: text)
            do {
                let prediction = try MessageClassifier().prediction(message: vec).label
                label.text = prediction
            } catch {
                label.text = "No Prediction"
            }
        }
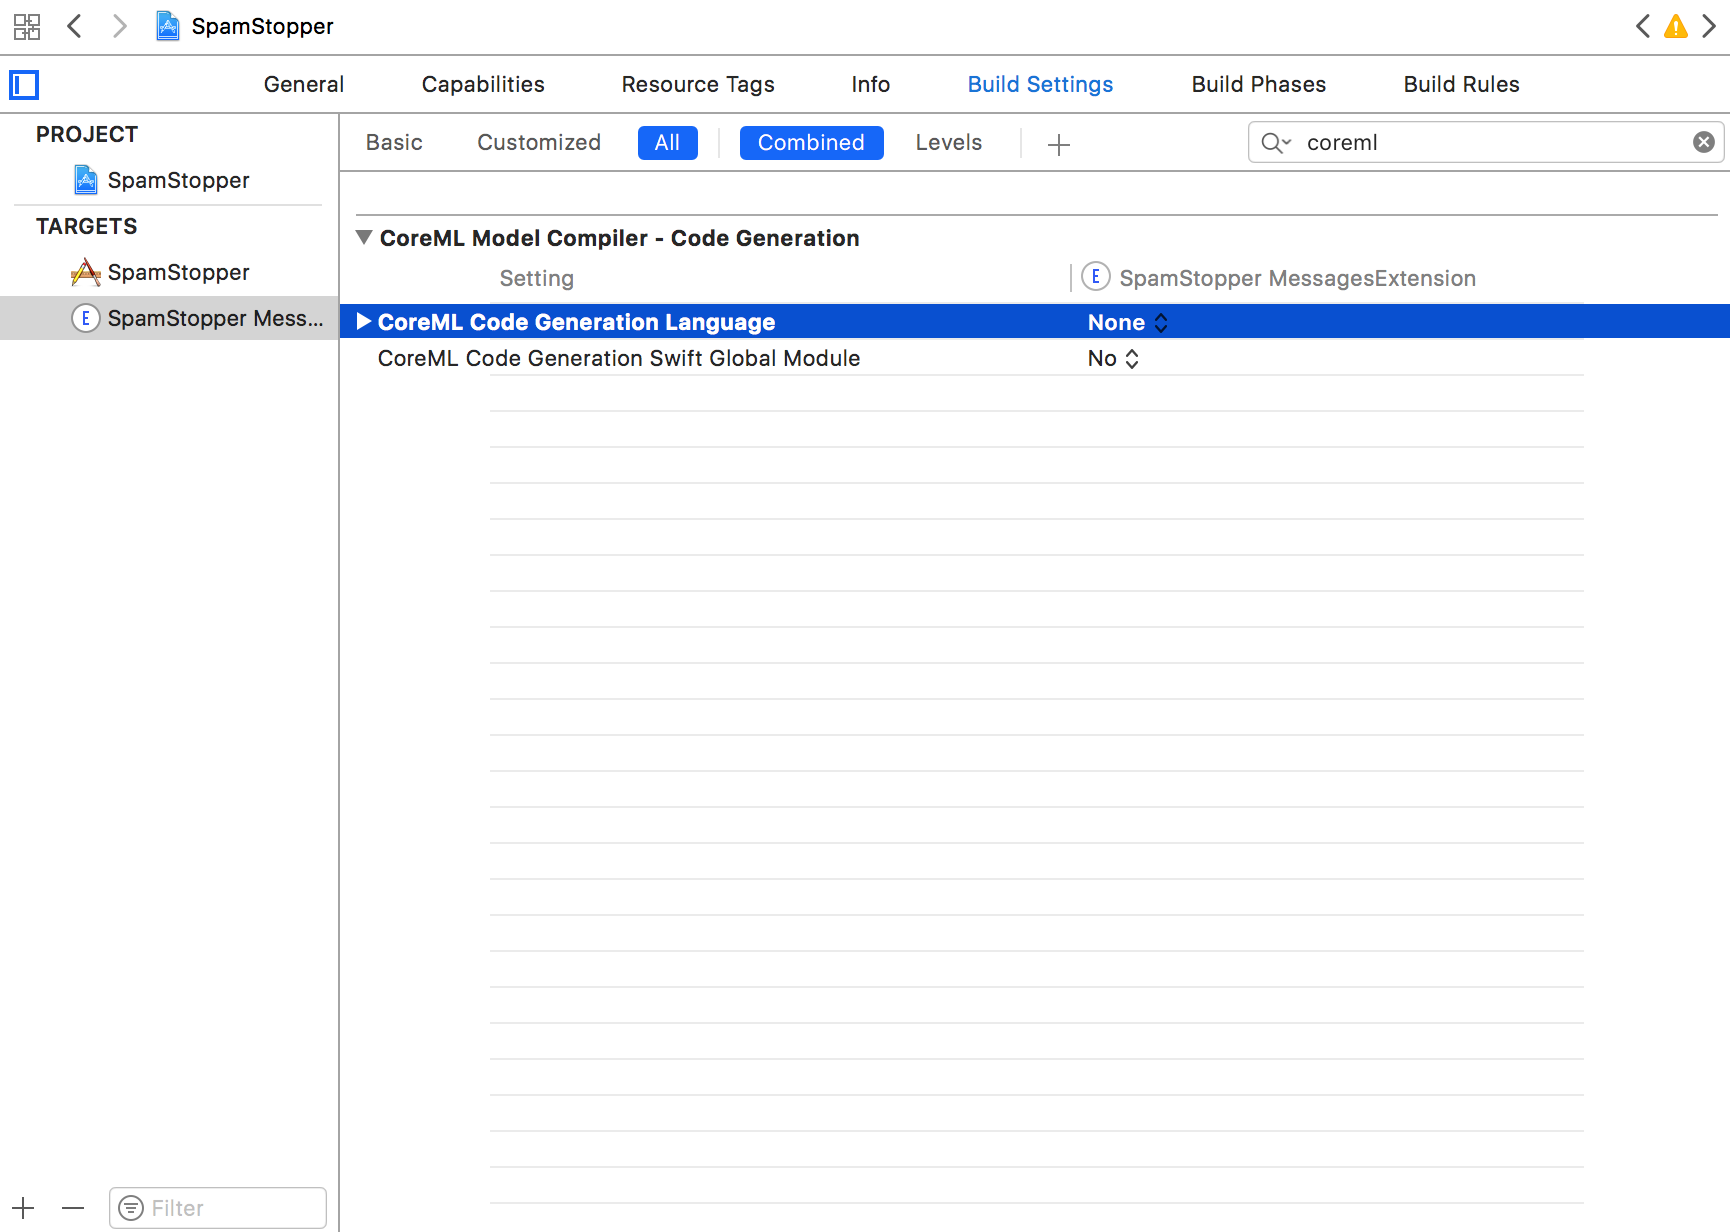
Finally, change the CoreML code generation language to Swift under Project > Build Settings > All:
… And you’re all done! Congrats! If everything worked right, it should look a little something like this when built.